DIY Zippered Pencil Pouch | How to Sew a Pencil Pouch! | Back to School Sewing | Make-up Brush Pouch | Free Pencil Pouch Pattern
As we get to the midpoint of July, ads start to share back to school deals! Some parts of the country will be going back to school in less than a month, so I thought I would share a quick and easy zippered pencil pouch pattern! It is easily scalable in case you want to make it bigger or smaller. It's all up to you! No matter if you are returning back to school in the classroom or virtually, you can be prepared. With that said, let's get started and make a zippered pencil pouch!


Video Instructions
Items Needed
This week, I have linked the items so if you want to buy them when you are reading you can! This is not a promotional thing, just brands and sites that I use for items!
- Zipper (I used a 6 inch zipper for this pattern)
- 2 pieces of 8.5 inch by 4.5 inch fabric (Feel free to make this bigger or smaller to meet your needs)
- Pins
- Scissors
- Sewing Machine
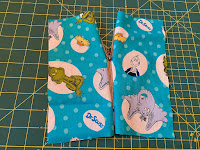
Step 1: Cut out two pieces of fabric.

Step 2: Take one piece of fabric with the right side up and place the zipper with the right side down and pin it along the long edge of the fabric. Repeat this for the second piece of fabric and sew the zipper to the fabric.


Step 3: Optional: My zipper was slightly short of the length of the fabric, so I had to sew up the fabric before and after the zipper as well. To do this, mark with pins how far to sew being sure to take the seam below where the zipper will be seen. Once pinned, sew it up.


Step 4: Open the zipper halfway if needed, and pin up the last three sides for the pouch with right sides of the fabric together. Sew it up!

Step 5: Trim up the fabric, clip the corners, and trim any extra threads. Turn right side out!

Step 6: Enjoy your pouch!


Comments
Post a Comment