How to Sew with Tweed Fabric
Sewing with tweed can make some beautiful creations, but due to its unique texture and heavy-duty style it can prove challenging! In today's post, we are going to walk through some tips and tricks to help you get that perfect tweed finished garment or piece every time!
Choose the Right Tweed
Tweed can come in various weights and types, so if you are starting with it for the first time opt for a light to mid-weight tweed. This will be easier to work with for your sewing machine and you! Also be sure to look out for any patterns that come up in the tweed. If it's a houndstooth or plaid, you will probably want to do some pattern matching. If it's a beaded tweed, you will need to remove the beads from the seam allowance.
Getting Started
Check the manufacturer's instructions for whether your tweed can be washed or if it's dry clean only. The tweed I used for my skirt is dry clean only!
Tools and Materials
- Sharp Scissors: Essential for cutting through tweed cleanly. Those fabric scissors should only be used on fabric for a reason!
- Needles: Use heavy-duty or sharp needles (size 14 or 16) to pierce the thick fabric.
- Thread: Use a strong, high-quality polyester thread.
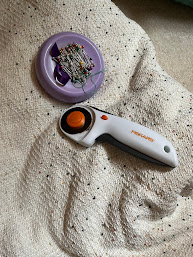
- Pins: Use heavy-duty pins or sewing clips, as regular pins may bend or slip out on heavy duty tweed. I've found that lightweight to medium tweed can handle regular pins though
Cutting the Fabric
Pattern Placement
- Pattern Matching: Align your pattern pieces carefully if working with patterned tweed to ensure seams match.
- Grain Line: Ensure all pieces are cut along the same grain line to maintain the fabric’s drape and appearance.
Adding Seam Allowance
- Extra Allowance: Consider adding extra seam allowance to account for fraying and to allow for adjustments. Tweed can fray very easily, so having a little extra fabric can give you extra space to account for any fraying.
Stabilizing the Tweed
Use Interfacing
- Fusible Interfacing: Apply fusible interfacing to areas like collars, cuffs, and hems to provide structure. I used fusible interfacing on the waistband of my skirt!
- Stay Tape: Use on shoulder seams and around armholes to prevent stretching.
Handle the Fabric with Care
- Minimize Handling: Tweed can fray easily, so handle cut pieces minimally.
- Edge Finishing: Finish edges with a zigzag stitch, serger, or bias tape to prevent fraying.
Sewing the Tweed
Stitch Settings
- Longer Stitch Length: Use a longer stitch length (around 3-3.5mm) to avoid pulling the fabric.
- Reduce Pressure: Reduce the presser foot pressure if your machine allows, to avoid marking the fabric.
Seam Techniques
- Staystitching: Staystitch curves and edges prone to stretching.
- Basting: Hand baste difficult sections for better control before machine sewing.
- Clipping Corners and Curves: Clip and notch seams for a smoother finish on curves and corners.
Pressing
- Use a Press Cloth: Always use a press cloth to avoid damaging the tweed’s texture. This is especially true if you are using tweed with beads or sequins!
- Gentle Pressing: Press gently with a steam iron, and avoid pressing too hard to maintain the fabric’s loft.
Tips and Tricks
- Practice First: If you’re new to sewing tweed, practice on a scrap piece to get a feel for handling the fabric.
- Use a Walking Foot: A walking foot can help feed the thick layers evenly through the machine.
- Be Patient: Tweed requires careful handling, so take your time to avoid mistakes.
These steps all helped me with sewing tweed for the first time and I hope they help you as well! Want to watch me make the tweed skirt? Check out my YouTube video! Looking for sewing tools? Check out my Amazon Storefront! Note: I make a commission off of items purchased through this link. Thank you for your support!


Comments
Post a Comment